
《模拟固件下的patch与hook》学习

前言
在之前的固件模拟中我遇到了各种各样的问题,大多都是通过patch的方法去解决,知道hook的办法却一直没有用过,正好刷到了模拟启动ASUS华硕路由器的http服务 - IOTsec-Zone这篇文章,之前我复现华硕的漏洞时也是没有成功模拟,发现这篇文章利用了hook的办法,并且引用了《模拟固件下的patch与hook》,是同一作者写的,所以准备学习一下这两篇文章,本文主要学习hook方法,下篇文章学习华硕的固件模拟。
由于原文中只给了某些示例和演示过程,而我又没怎么接触过hook,所以示例用的还是原文中的示例,我主要补充一些详细的知识点。
引入LD_PRELOAD
LD_PRELOAD实现注入的原理
LD_PRELOAD是linux系统中的一个环境变量,可以指定优先加载某个动态库。当主程序中有相同的符号出现在不同的动态库中,会使用优先加载的动态库中的符号。
根据这个原理,如果要被hook的函数在动态库a中,那么可以重载一个相同定义的函数并把它编译成动态库b,并使用LD_PRELOAD执行优先加载动态库b。当启动主程序的时候,主程序会调用动态库b中的函数。
通过这个环境变量,我们可以在主程序和其动态链接库的中间加载别的动态链接库,去覆盖正常的函数库。
默认linux的动态库链接顺序:LD_PRELOAD --> LD_LIBRARY_PATH --> /lib --> /usr/lib;
示例
该例子是利用strncmp对比密码是否正确
1 | // gcc -g test1.c -o test1 |
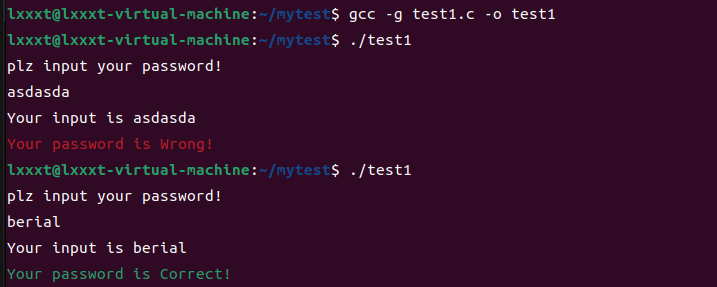
接着我们自己编写编译一个hook.so,并且使用LD_PRELOAD加载该动态链接库:
1 | // gcc -g -shared -fPIC hook.c -o hook.so |

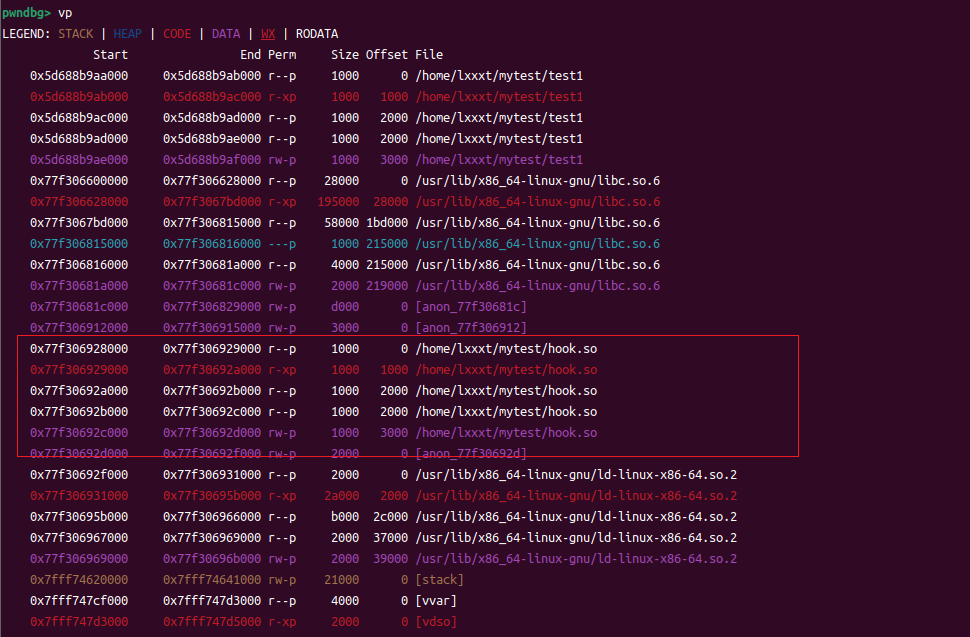
此时,无论我们输入什么都会显示密码正确,使用gdb动态调试看下
步进到strncmp函数
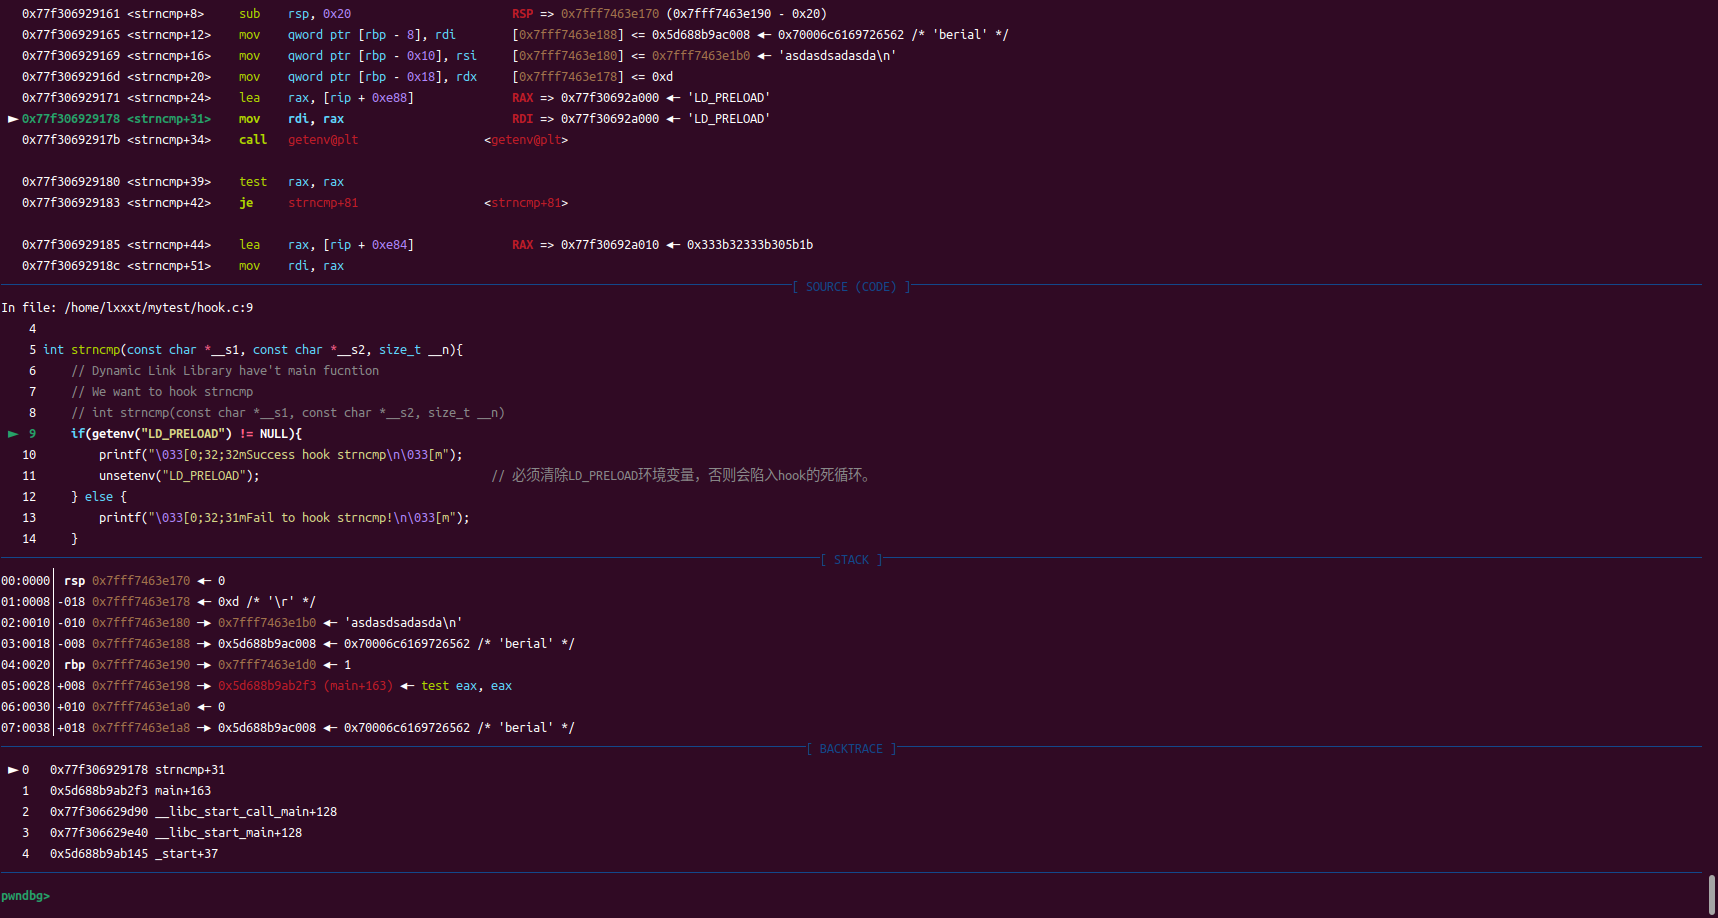
确实是我们写的strncmp。
注
LD_PRELOAD=$PWD/hook.so ./test1等同于:
1 | export LD_PRELOAD=$PWD/hook.so |
Topic.1(Hack In The Box Amsterdam: Bin 100)
以2014年的Hack In The Box Amsterdam: Bin 100逆向题作为小菜,hook方法之一的LD_PRELOAD开始在本题中崭露头角:

程序一直打印英文句子,并且大小写是混乱的,我们用IDA来分析
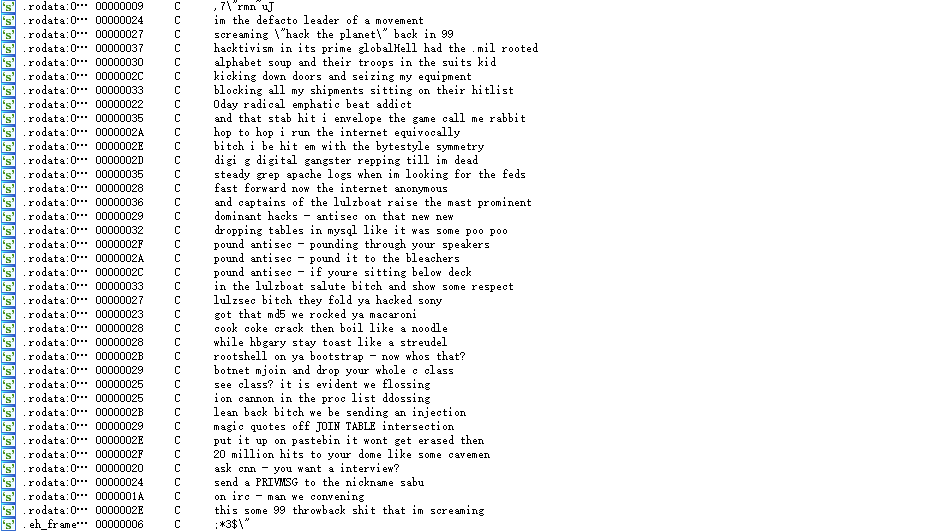
原本是正常的,那么就说明有流程对字母会有大小写的转换
我把程序分为两部分,一部分打印英文句子,另一部分打印flag
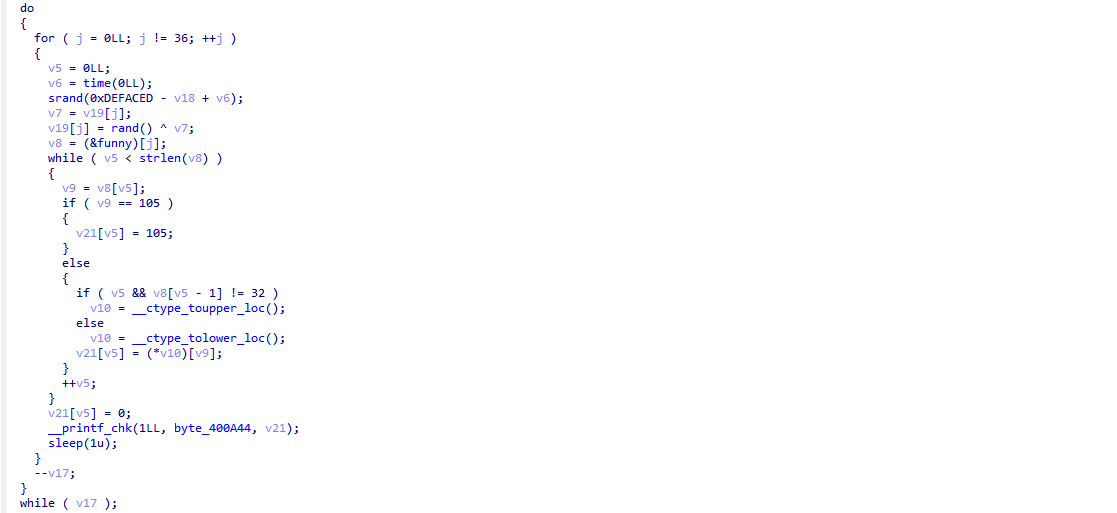
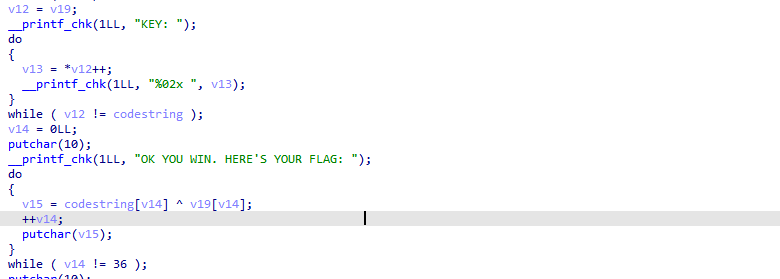
根据第一部分,我们需要v19在最后循环结束的值,这也是为什么这个不能直接nop掉sleep的原因,但sleep(1)在循环多次后耗费的时间又很长,并且调用sleep的最终目的是为了v6的增加而非真的要等待1s;所以我们可以利用LD_PRELOAD的预先加载功能达到hook这两个函数的目的;
而我们的目的就是每次v6自增1,所以修改sleep函数和time函数
1 | // 编译命令:gcc -shared -fPIC hook_time.c -o hook_time.so |
printf到最终在屏幕显示所耗费的时间不会拖延程序执行代码的时间,就算是程序在短时间内打印出大量数据,则打印出某一数据时该printf肯定早已完成执行(屏幕的显示与printf的执行并不同步)。
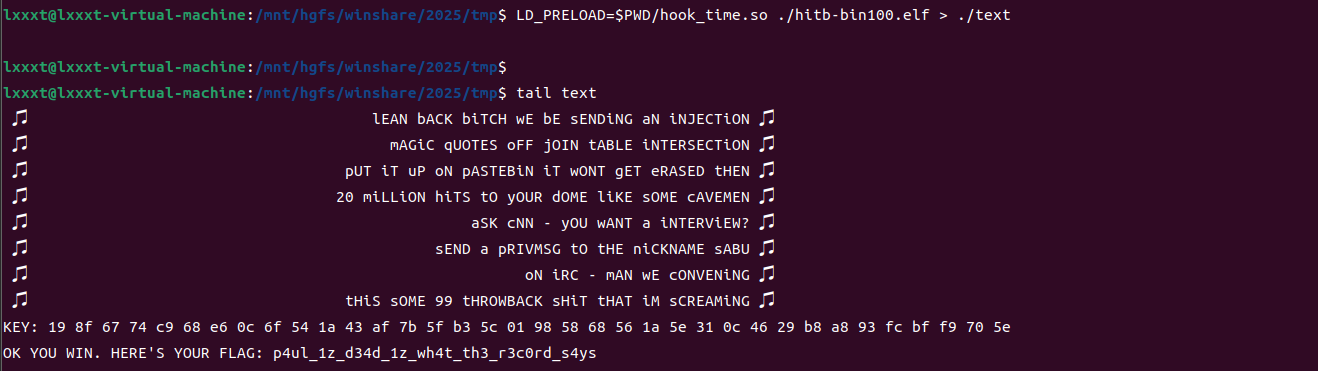
拿到flag了
Topic.2 (Cisco RV160W固件模拟“qemu-system”)
固件下载地址,该固件涉及的漏洞为CVE-2021-1291,本文主要是学习环境模拟,所以不分析漏洞,后面会发文章分析;
接着我们系统级模拟
本机:
net.sh:
1 | sudo tunctl -t tap0 -u `whoami` # 为了与 QEMU 虚拟机通信,添加一个虚拟网卡 |
run.sh:
1 | #!/bin/sh |
qemu虚拟机:
1 | ifconfig eth0 10.10.10.2/24 |
文件系统用python传入即可
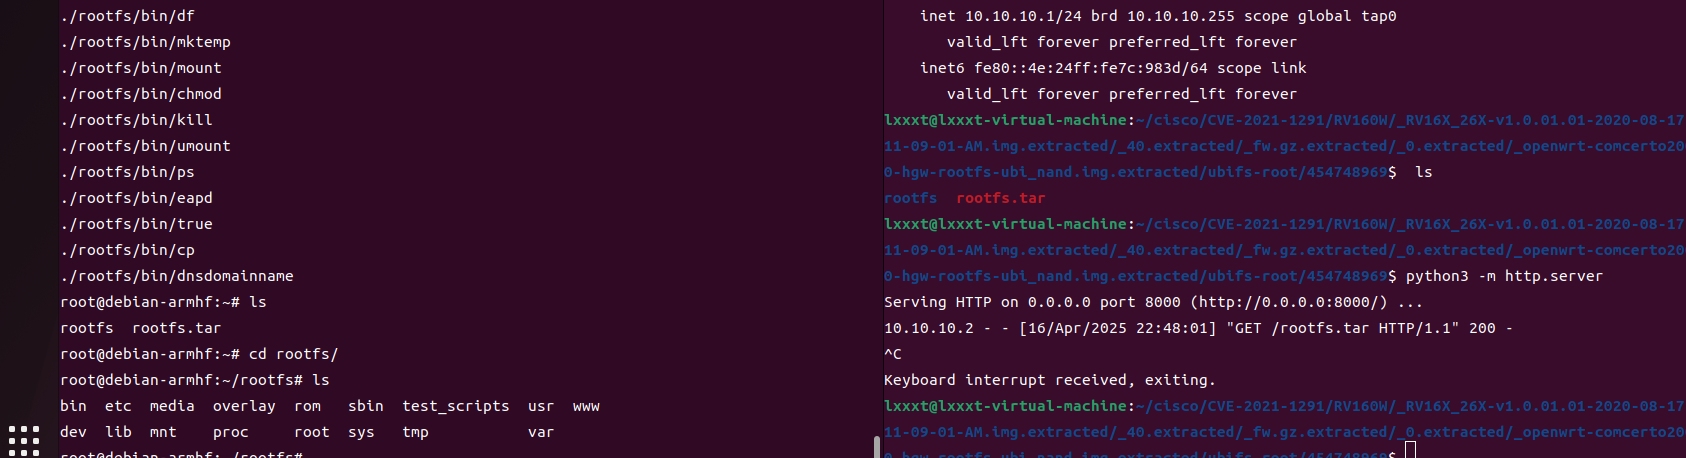
1 | $ chmod -R 777 ./rootfs |
该路由器的服务有mini_httpd提供,运行下试试

运行失败了,我们用ida去看下,根据报错字符串搜索
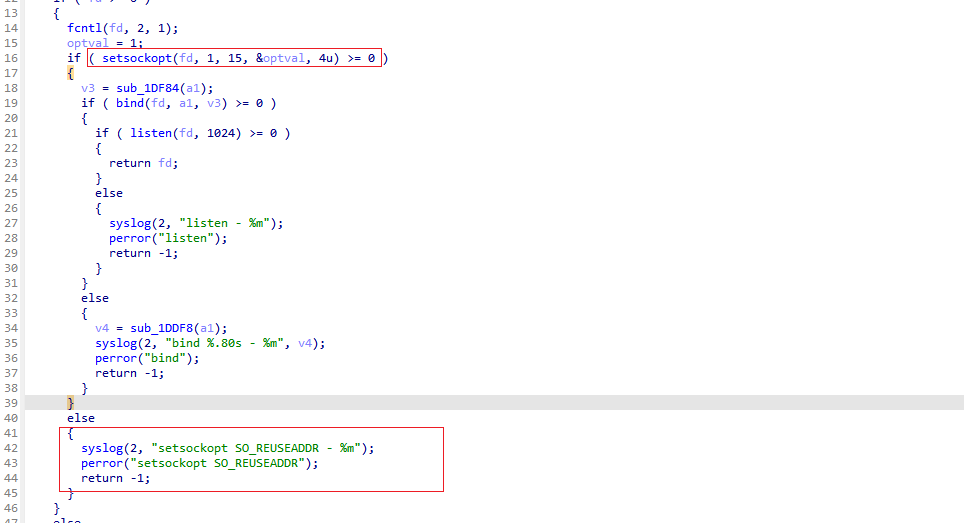
错误原因就是函数setsockopt在这是有关套接字的选项时由于参数不合法导致的函数返回值小于0,该函数返回值为1就行了。
首先安装编译arm的依赖
1 | sudo apt install libncurses5-dev gcc-arm-linux-gnueabi build-essential synaptic gcc-aarch64-linux-gnu |
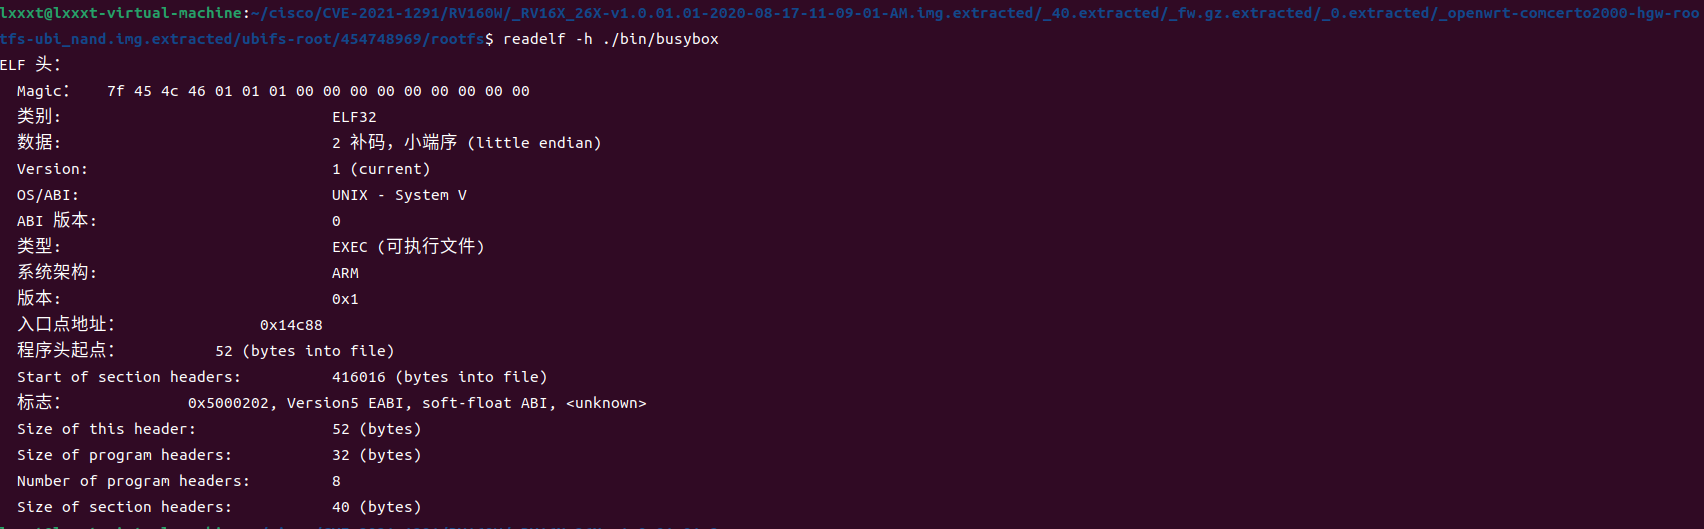
gcc-arm-linux-gnueabi所采用的是glibc

而Cisco RV160W则采用的是eglibc
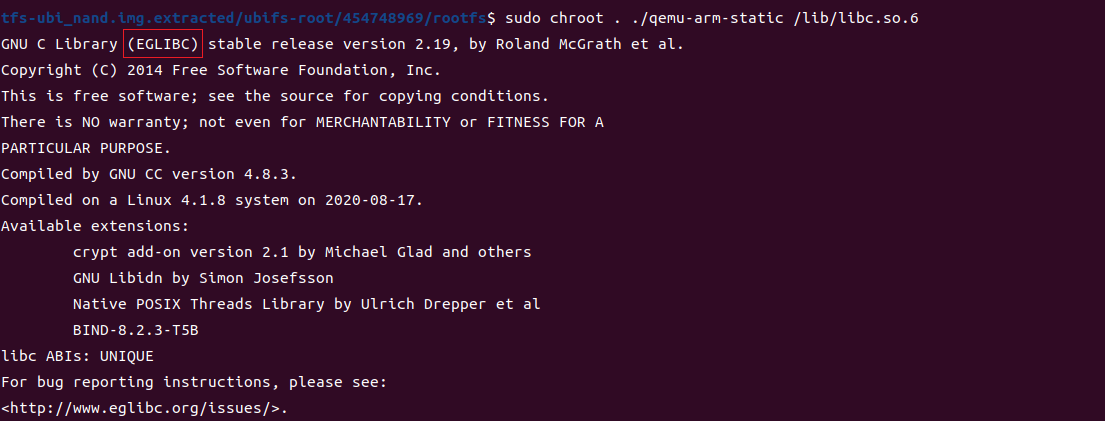
glibc与eglibc编译得到的可执行程序是相互兼容的;
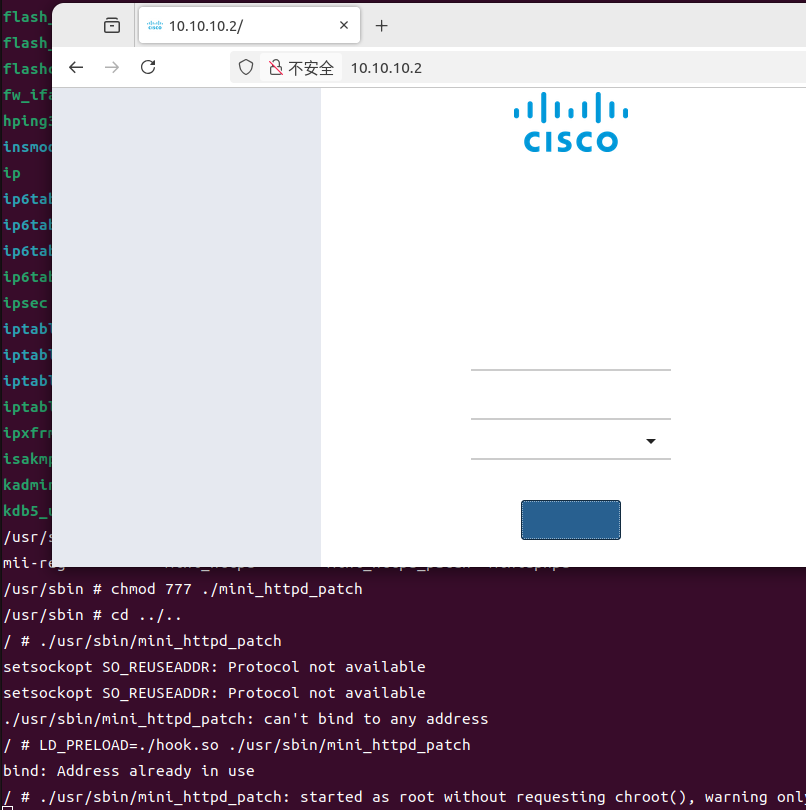
hook代码:
1 | // 编译命令:arm-linux-gnueabi-gcc -shared -fPIC hook.c -o hook.so |

接着启动程序试试

成功启动了,但是403了,搜索下字符串

直接给nop了
nop之后发现界面不是很正常,回文件系统找原因
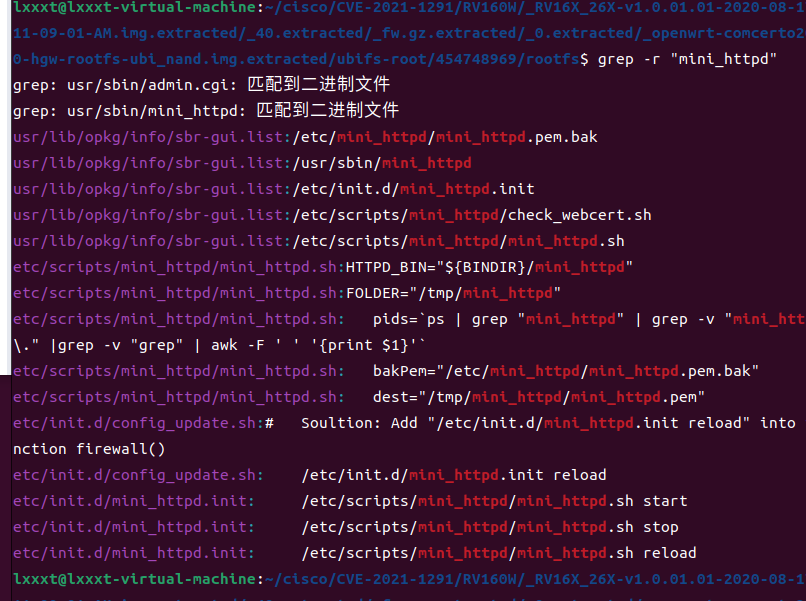
发现了.sh和.init文件,回去执行init

但我的界面还是有些问题,不知道是什么原因。
- 标题: 《模拟固件下的patch与hook》学习
- 作者: Berial
- 创建于 : 2025-04-16 15:55:25
- 更新于 : 2025-04-17 16:54:24
- 链接: https://berial.cn/posts/模拟固件下的patch与hook学习.html
- 版权声明: 本文章采用 CC BY-NC-SA 4.0 进行许可。